Note
Go to the end to download the full example code.
Update Image and Isocurve Visuals#
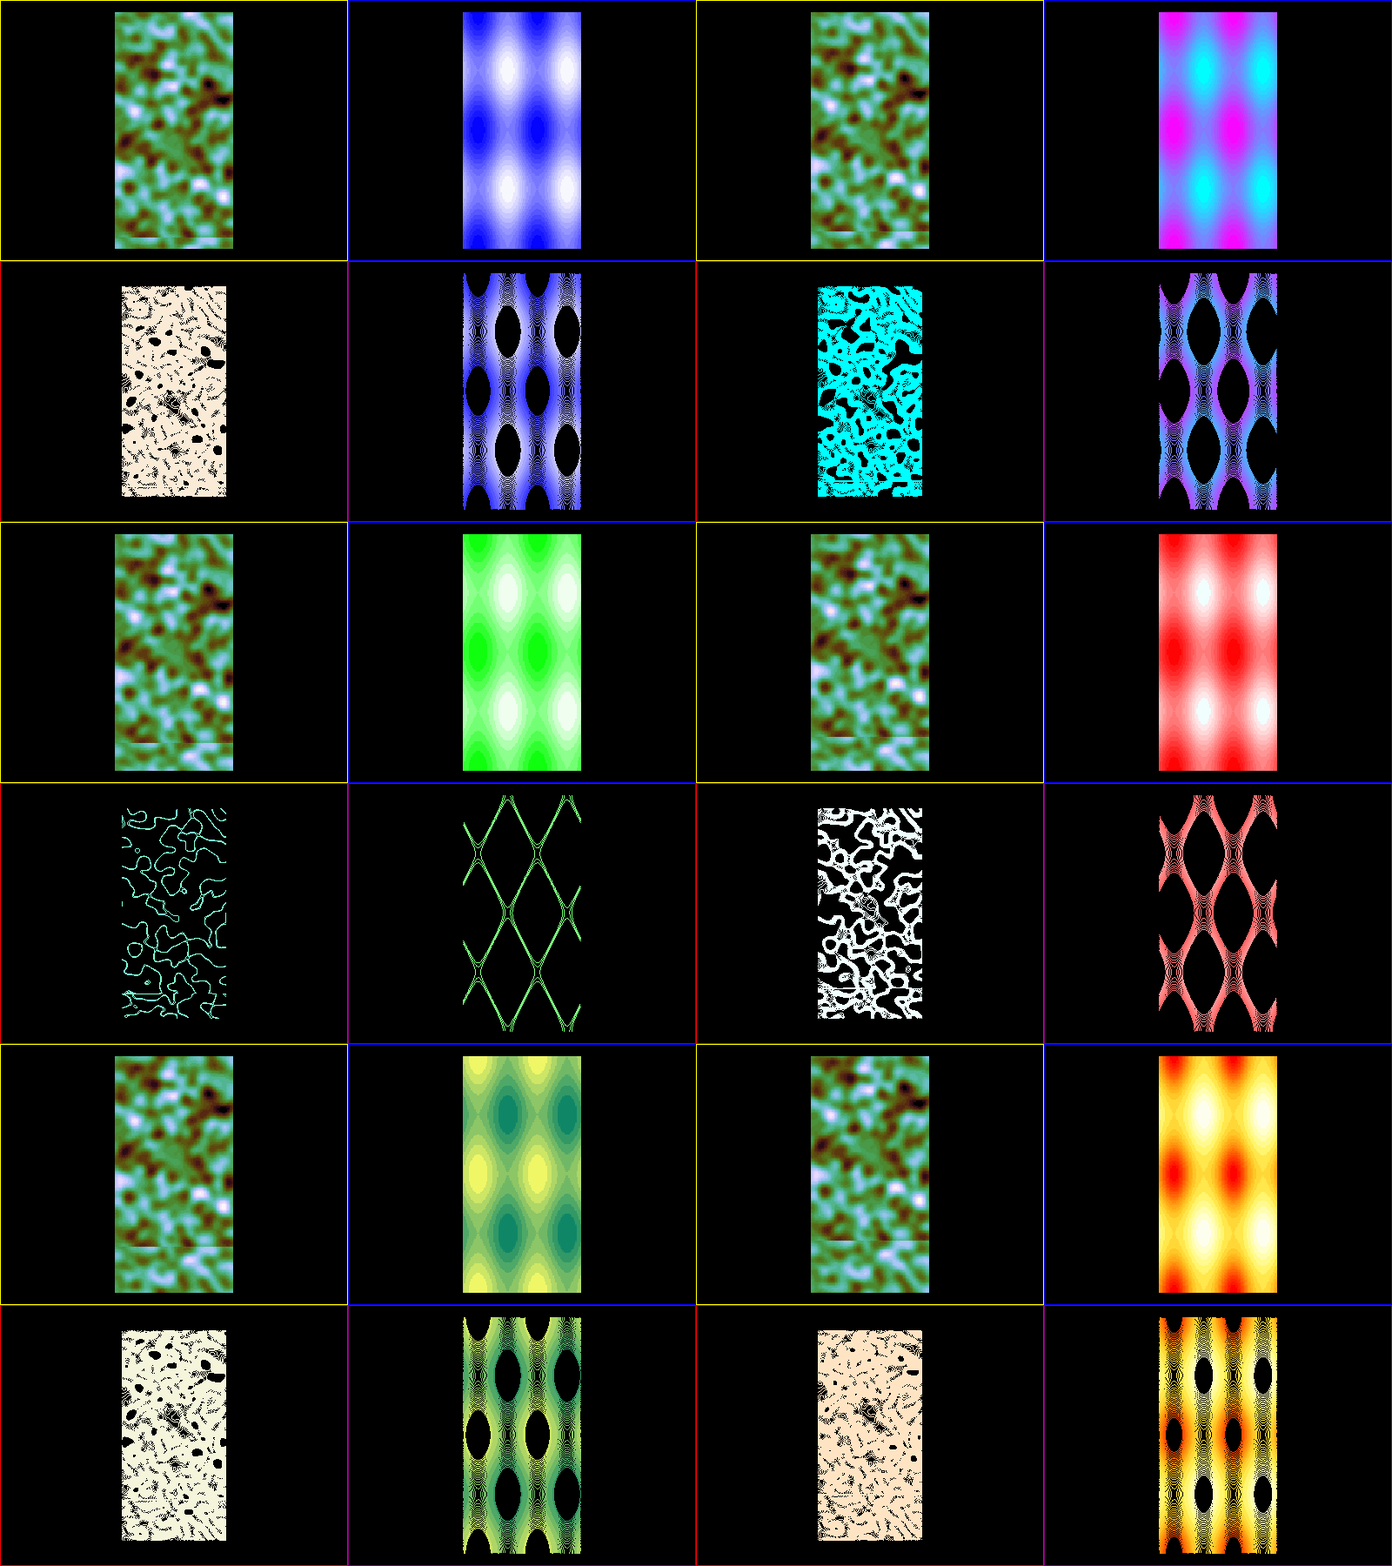
Show use of SceneCanvas to display and update Image and Isocurve visuals using ViewBox visual.

import sys
import numpy as np
from itertools import cycle

from vispy import app, scene
from vispy.scene import STTransform
from vispy.util.filter import gaussian_filter
from vispy.color import get_colormaps, get_color_names

canvas = scene.SceneCanvas(keys='interactive',
                           title='Show update capabilities of Isocurve Visual',
                           show=True)
canvas.show()

# Setting up four viewboxes
vb1 = scene.widgets.ViewBox(border_color='yellow', parent=canvas.scene)
vb2 = scene.widgets.ViewBox(border_color='blue', parent=canvas.scene)
vb3 = scene.widgets.ViewBox(border_color='red', parent=canvas.scene)
vb4 = scene.widgets.ViewBox(border_color='purple', parent=canvas.scene)

vb = (vb1, vb2, vb3, vb4)

# add grid as central widget, add viewboxes into grid
grid = canvas.central_widget.add_grid()
grid.padding = 0
grid.add_widget(vb1, 0, 0)
grid.add_widget(vb2, 0, 1)
grid.add_widget(vb3, 1, 0)
grid.add_widget(vb4, 1, 1)

# panzoom cameras for every viewbox
for box in vb:
    box.camera = 'panzoom'
    box.camera.aspect = 1.0

# Create random image
img_data1 = np.empty((200, 100, 3), dtype=np.ubyte)
noise = np.random.normal(size=(200, 100), loc=50, scale=150)
noise = gaussian_filter(noise, (4, 4, 0)).astype(np.float32)
img_data1[:] = noise[..., np.newaxis]

# create 2d array with some function
x, y = np.mgrid[0:2*np.pi:201j, 0:2*np.pi:101j]
myfunc = np.cos(2*x[:-1, :-1]) + np.sin(2*y[:-1, :-1])
myfunc = myfunc.astype(np.float32)

# add image to viewbox1
image1 = scene.visuals.Image(noise, parent=vb1.scene, cmap='cubehelix')
# move image behind curves
image1.transform = STTransform(translate=(0, 0, 0.5))
vb1.camera.set_range()

# add image to viewbox2
image2 = scene.visuals.Image(myfunc, parent=vb2.scene, cmap='cubehelix')
# move image behind curves
image2.transform = STTransform(translate=(0, 0, 0.5))
vb2.camera.set_range()

# create some level for the isocurves
levels1 = np.linspace(noise.min(), noise.max(), num=52, endpoint=True)[1:-1]
levels2 = np.linspace(myfunc.min(), myfunc.max(), num=52, endpoint=True)[1:-1]

# create curve 1a (image overlay, black) and 1b (plain, cubehelix colored)
# to viewboxes 1 and 3
curve1a = scene.visuals.Isocurve(
    noise, levels=levels1[::4], color_lev='k', parent=vb1.scene)
curve1b = scene.visuals.Isocurve(
    noise, levels=levels1, color_lev='cubehelix', parent=vb3.scene)

# create curve 2a (2darray overlay, black) and 2b (plain, cubehelix colored)
# to viewboxes 2 and 4
curve2a = scene.visuals.Isocurve(
    myfunc, levels=levels2[::4], color_lev='k', parent=vb2.scene)
curve2b = scene.visuals.Isocurve(
    myfunc, levels=levels2, color_lev='cubehelix', parent=vb4.scene)

# set viewport
vb3.camera.set_range((-100, 200), (0, 200))
vb4.camera.set_range((0, 100), (0, 200))


# setup update parameters
up = 1
index = 1
clip = np.linspace(myfunc.min(), myfunc.max(), num=51)
cmap = cycle(get_colormaps())
color = cycle(get_color_names())


def update(ev):
    global myfunc, index, up, levels2, noise, cmap, color

    if index > 0 and index < 25:
        # update left panes rolling upwards
        noise = np.roll(noise, 1, axis=0)
        image1.set_data(noise)
        curve1a.set_data(noise)
        curve1b.set_data(noise)

        # update colors/colormap
        if (index % 5) == 0:
            curve1b.color = next(color)
            cm = next(cmap)
            image2.cmap = cm
            curve2b.color = cm

        # change isocurves by clipping data/or changing limits
        # update curve1b levels (clip)
        curve1b.levels = levels1[index:-index]

        # update curve2b data with clipped data
        im2 = np.clip(myfunc, clip[index], clip[-index])
        curve2b.set_data(im2)

        index += up
    else:
        # change index direction
        up = -up
        index += up

    canvas.update()

# setup timer
timer = app.Timer()
timer.connect(update)
# slow this down a bit to better see what happens
timer.start(0)

if __name__ == '__main__' and sys.flags.interactive == 0:
    app.run()
Total running time of the script: (0 minutes 6.043 seconds)
